How to Set Up Google OptimizeOct222018

What Is Google Optimize?
Google Optimize is a free A/B testing and personalization Google tool that allows website owners to set up experiments and discover what works best on their sites. Google Optimize offers a free version, and a paid version named 360 Optimize.
Per the Google Blog:
"People want compelling and relevant digital content that's delivered at just the right moment. That's why Google Optimize is making changes to help businesses deliver better, more personalized experiences to your customers. Now, in addition to running short-term website experiments with Optimize, you can create custom website experiences that deliver the right message to your customers—every time they visit your site.
Optimize has always helped you test which version of your site works best for your customers. Now it’s even easier for you to immediately launch the winning version of your site with just a few clicks.
Say you’ve run an A/B test on your site and Optimize has determined the winning version. You can now simply click “DEPLOY LEADER,” and Optimize will re-create the winning version of your site as a new personalization that you can launch to any segment of your customers.
You can also create personalized experiences without running a test first. For instance, you might want to offer a special like free shipping to all customers in San Francisco.
Launching a personalization from scratch is now simple in Optimize. First, click the “Create Experience” button and select “Personalization” as the experience type. Using the Optimize Visual Editor, you can add the free shipping offer to your site. Then, select “users located in San Francisco” and launch the personalization."
Google Optimize Works Hand in Hand with Google Analytics
Google Optimize integrates directly into your Google Analytics account, so to use Optimize, you must first have Google Analytics installed on your website.
If you don't have Analytics installed, you can set it up here: https://analytics.google.com/analytics/web/
How to Set Up Google Optimize
Log into your Google Analytics account: https://analytics.google.com/analytics/web/
While signed into Analytics, open a new browser window and go to Google Optimize: https://optimize.google.com/
Click the blue “Get Started” button, then select the FREE option.
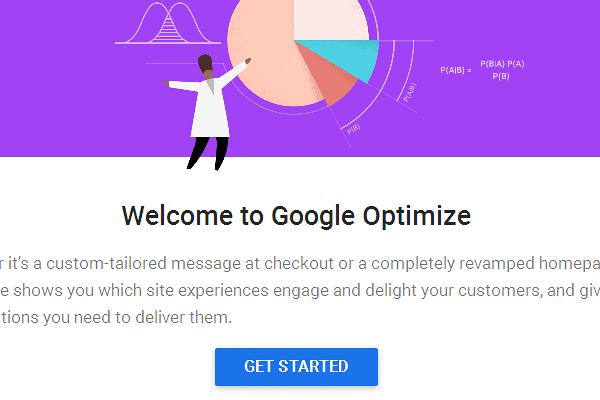
A new screen will come up asking you to select Email notification preferences and account data settings. Check off your preferences and then proceed.
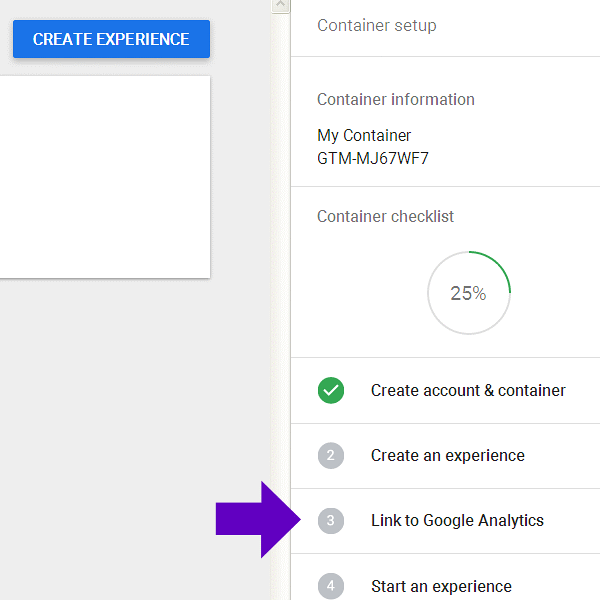
In the Right page column, scroll down to "Link to Google Analytics" and Click the down arrow:
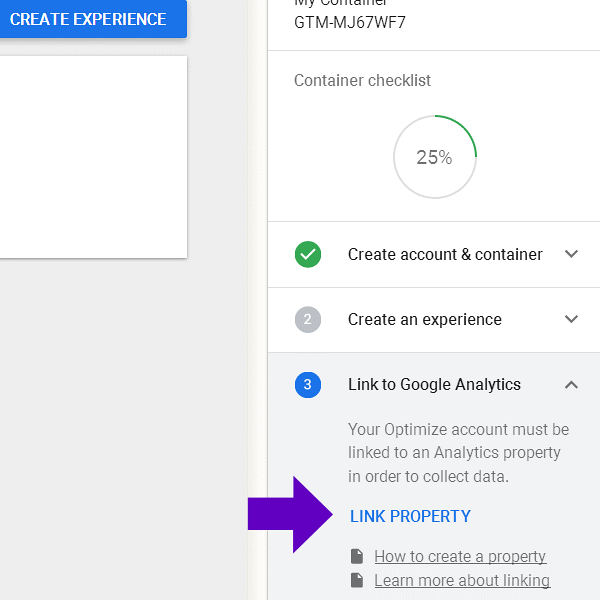
Then Click on "Link Property":
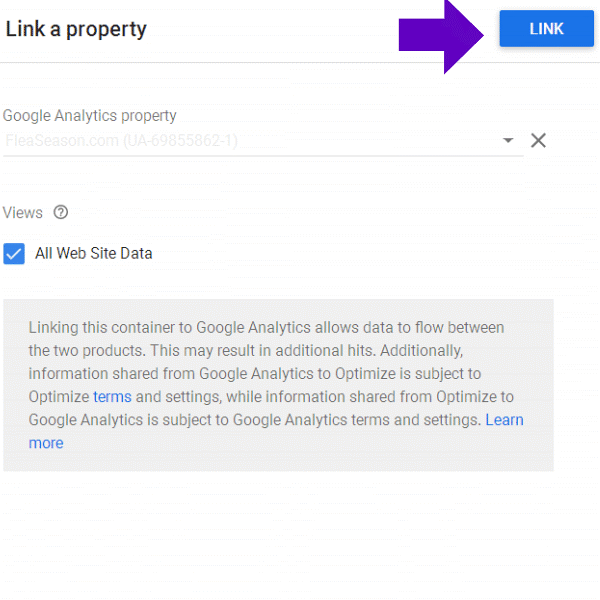
Select the Property you want to Link, then Click on the blue “Link” button:
You'll be asked:
Add Optimize snippet to your site?
You will need to add a short code snippet to your site before you can run Optimize experiments or personalizations. You can get the snippet now, or find it later on the container details panel.
Add the code snippet now or wait.
If you choose to skip this step for now you won’t be able to run any tests until Optimize has direct access to run experiments.
Note:
If working with code on your site is not something you do on a regular basis, you should have the code integrated by an experienced web designer or programmer.
Two pieces of code will be generated on the screen:
The Optimize plugin snippet and the updated Analytics tracking code.
Only use one code or the other, not both.
You can replace the Analytics Tracking code in its entirely with the new one, or you can swap out the single plugin code.
Once you’ve decided which way to go – you’ll want to update the tracking code on all the webpages you want to run your tests on (maybe one or two, or all pages).
Additional information is here from Google support: https://support.google.com/360suite/optimize/answer/6262084
Add the Page Hiding Snippet
Google suggests to add a “page hiding snippet” to your code, directly before the Analytics tracking code to ensure there’s no issues with page flicker or slow loading content when test variations are served.
Chrome Extension Option
If you want to use the Google Optimize visual editing interface, you can install the Chrome extension:
https://chrome.google.com/webstore/detail/google-optimize/bhdplaindhdkiflmbfbciehdccfhegci
Create an Experiment
Once all coding is inserted, you move forward and create a testor experiment.
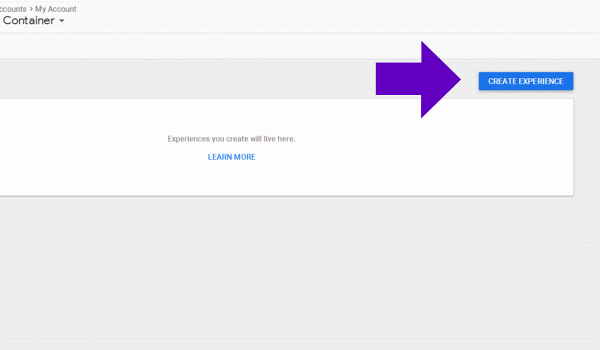
Click on the blue “Create Experiment” button:
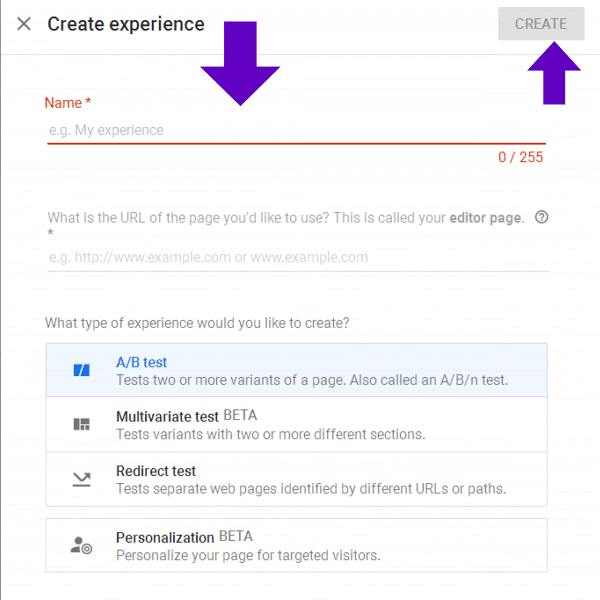
Enter the details for your test/experiment, then Click on “Create”:
On the next screen you'll be setting up the criteria for your text/experiment and selecting a number of variants and filters for your test:
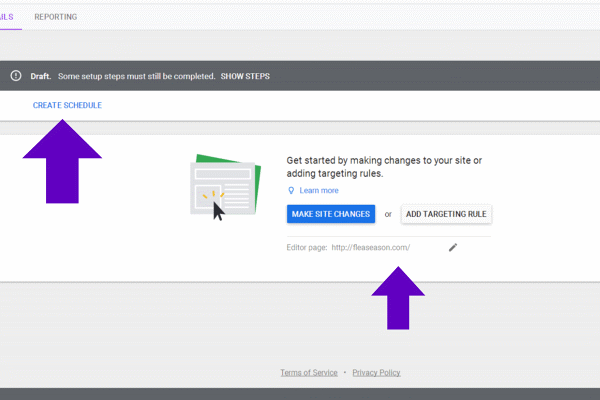
Google requires all details be captured before you can launch the test/experiment.
Once you’ve selected all your test/experiment details, Click on the “Save” button.
To customize variants click on the variant you want to redefine and you'll be taken to the editor.
Launch a Text/Experiment
Once you've completed setting all the filters, take the test/experiment out of Draft mode and launch it by Clicking on the gray "Draft" bar at page Top and Click "Start Experiment".
Google Optimize Support:
Optimize Personalization Overview:
https://support.google.com/optimize/answer/9112930?hl=en
Google Optimize Setup:
https://support.google.com/optimize/answer/6211921?hl=en
Create a Personalization:
https://support.google.com/optimize/answer/9127720
Optimize Personalization Reports:
https://support.google.com/optimize/answer/9122966?hl=en
Google Optimize Help:
https://support.google.com/optimize/?hl=en#topic=6314903


