How to Add Customized Google Maps into WordPress WebsitesJul162018
You may want to display a location map for your business or organization, or you may have a special event you need to showcase a map for directions.
A WordPress Plugin will help you easily accomplish placing a customized map on your WordPress site to feature your physical location and other important information.
For example purposes, we’ll be using the following Plugin:
MapPress Easy Google Maps
https://wordpress.org/plugins/mappress-google-maps-for-wordpress/
Active Installs: 100,000+
Cost: Free
Sign into your WordPress Admin area, install and activate the Plugin.
Open a Page or Post in Edit mode.
Scroll down the page until you locate the MapPress Easy Google Maps box.
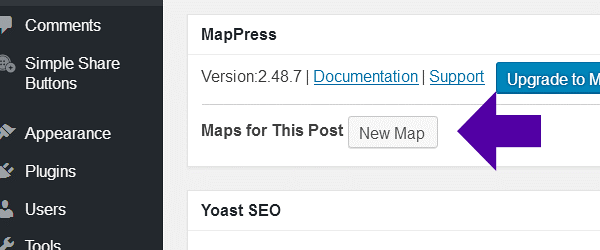
Click the ‘New Map’ button:
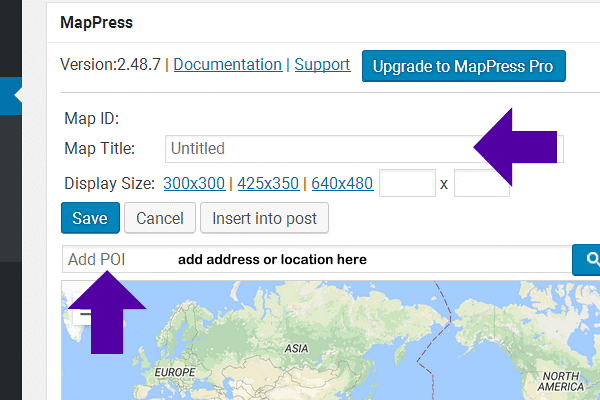
Name your map and select a size from three pre-sets or make a custom size map for display.
Enter an address or location.
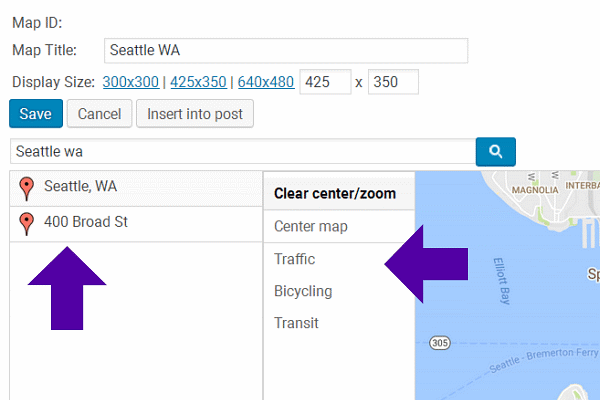
Location will be generated. You can add detail for Points Location, and choose to display Bike routes, Traffic or Transit routes.
When finished, Click the ‘Save’ blue button.
Hover over the map name and Click ‘Insert into Post’:
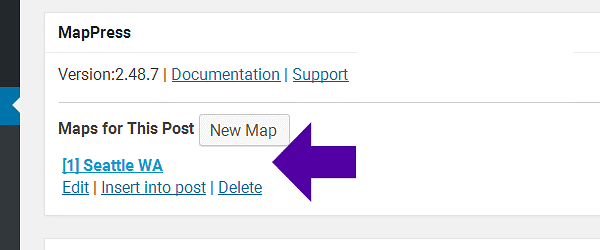
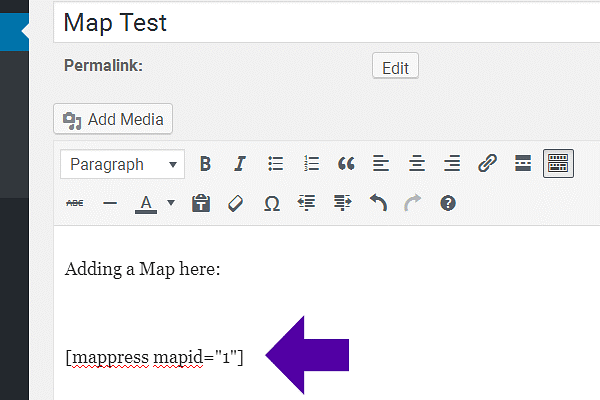
After clicking ‘Insert into Post’, you’ll notice a Shortcode is now appearing on your Post area. You can copy and paste this code anywhere or leave it in the Post as-is:
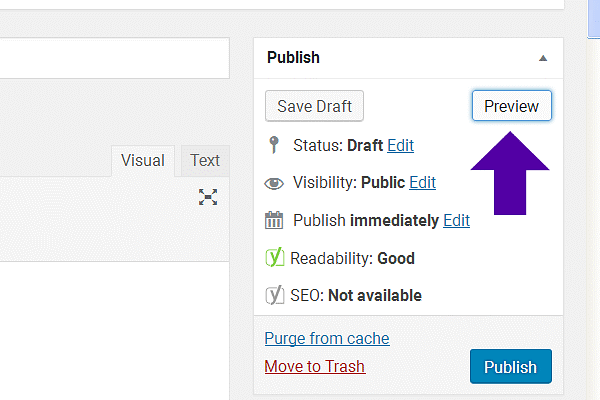
In the upper Right Corner of the WordPress Admin dashboard, locate the ‘Preview’ button.
Click to review your page and Map placement before you Publish:
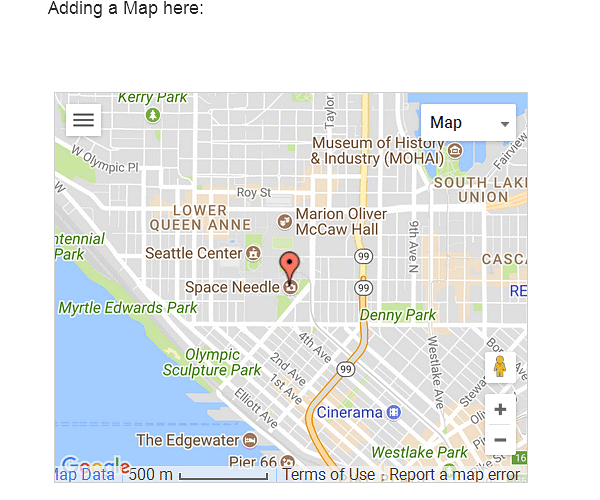
If you should want to make changes to the Map, go back to the Page/Post and Edit by scrolling back down to the MapPress Easy Google Maps area, and Hover over the Map Name – then select ‘Edit’.
If You Should Need a Google API Key
Google requires an API key to use the Google Maps API:
Get a Browser API key
- Use this link to go to the Google Developer Console
- From the projects list, select a project or create a new one.
- Click Continue to enable the API and any related services.
- On the Credentials page, get an API key.
- It is usually easiest to start with an unrestricted key, but if you want you can secure the key so it can only be used specific web sites.
- Select Restrict key to set a browser restriction on the API key.
- In the Key restriction section, select HTTP referrers (web sites), then follow the on-screen instructions to set referrers. Usually you’d want to enter your website URL here, as the referrer.
- Copy the API key and click ‘OK’. Paste the key into the MapPress settings screen.
Note: this Google Developer Console link:
https://console.developers.google.com/flows/enableapi?apiid=maps_backend,geocoding_backend,directions_backend,distance_matrix_backend,elevation_backend,places_backend,geolocation&keyType=CLIENT_SIDE&reusekey=true
should automatically enable the correct APIs. If you need to enable them manually, go to the Library menu and enable: Google Maps Javascript API, Google Places API Web Service, Google Maps Geocoding API, Google Maps Directions API, Google Maps Geolocation API.
Other WordPress Map Plugins to Consider Using:
Ultimate Google Maps
https://wordpress.org/plugins/google-maps-widget/
Active Installs: 100,000+
Cost: Free
WP Google Maps
https://wordpress.org/plugins/wp-google-maps/
Active installs: 400,000+
Cost: Free and Pro Version
Intergeo Maps
https://wordpress.org/plugins/intergeo-maps/
Active Installs: 60,000+
Cost: Free
WP Google Map
https://wordpress.org/plugins/gmap-embed/
Active Installs: 30,000+
Cost: Free
How to Embed a Google Map Manually into Your Website
Open Google Maps, https://www.google.com/maps, in your browser and enter the address you want to feature on the map:

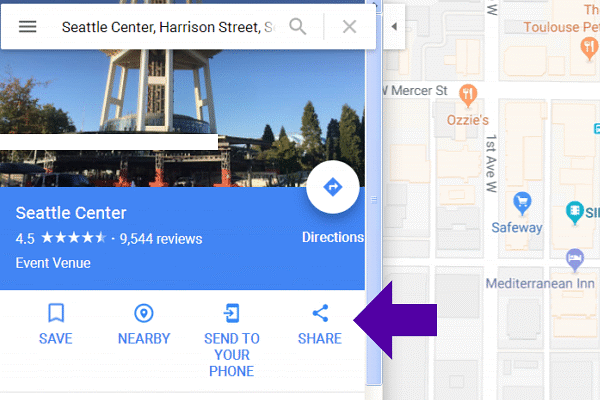
Once you’ve displayed the location of choice, Click on the ‘Share’ button:
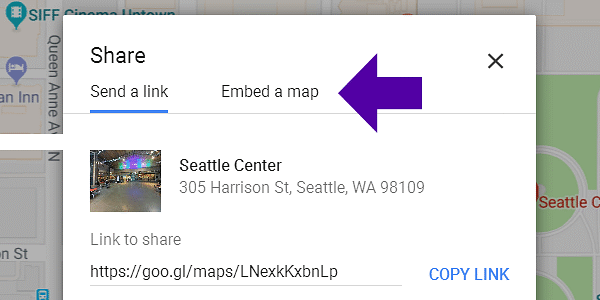
Select ‘Embed a map’:
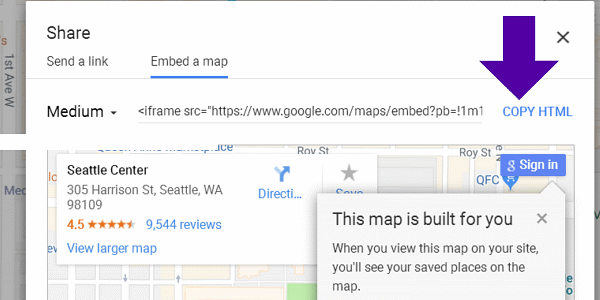
On the Left, notice you can choose the Map size. Select from Small, Medium, Large or Custom.
Then select ‘COPY HTML’ and paste the code into a Page or Post on your WordPress site:
That’s it! All Done!
Return


