How to Schedule Posts in WordPressMar222018
Scheduling Posts within WordPress is a feature many people never notice. It’s a helpful option that allows you to set the exact date and time for publishing a Post. Useful for maintaining a regular publishing schedule whether you’re on vacation or just having a busy week.
Let’s Get Started
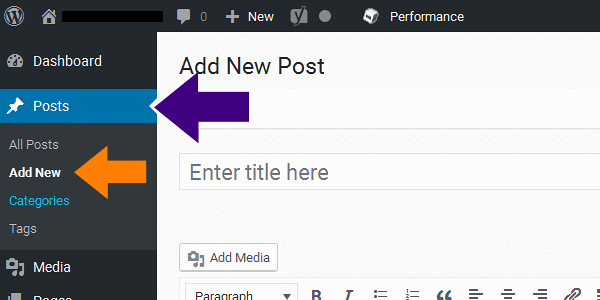
Once signed into WordPress Admin, navigate to Posts located in the upper Left corner.
Click ‘Add New’:
Author Your Post, and Save as a Draft.
Preview the content you just wrote before scheduling to Post.
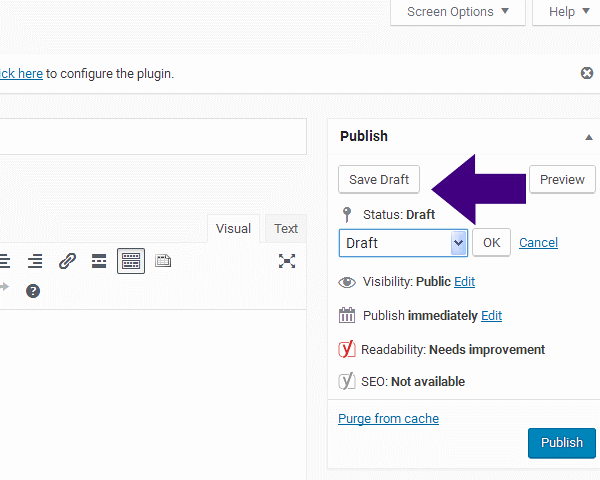
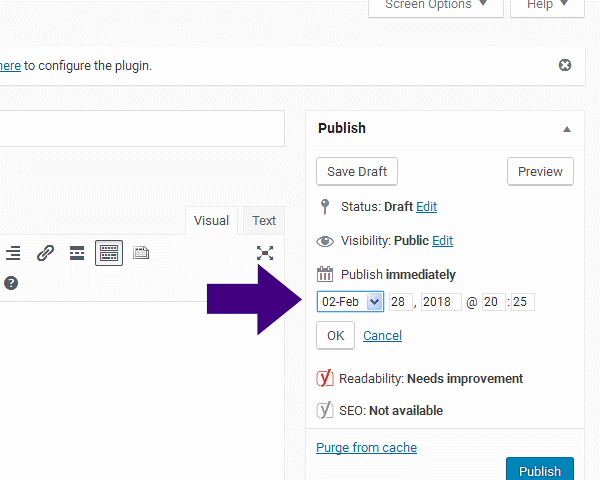
Look in the upper Right Corner to the Publish area.
This Publish box has every Post set to Publish immediately when you click the blue Publish button.
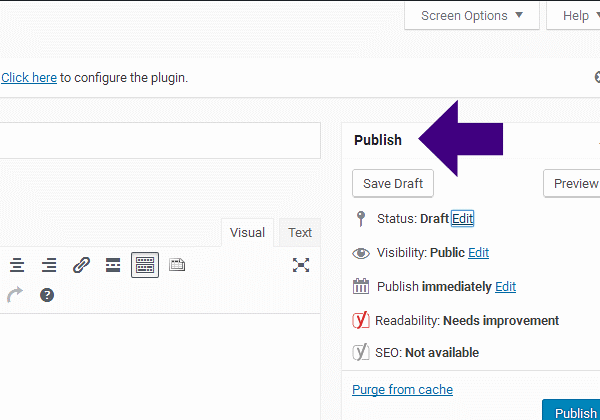
Click ‘Edit’ to the right of ‘Publish Immediately’, and select the Date, Year and Specific Time you want your Post Published.
Then Click ‘OK’.
Be aware WordPress uses a 24-hour format, even if your Blog uses a 12-hour format.
After you clicked ‘OK’ to schedule – notice the default ‘Publish’ immediately option changes to the display the specific date and time you scheduled your Blog to post.
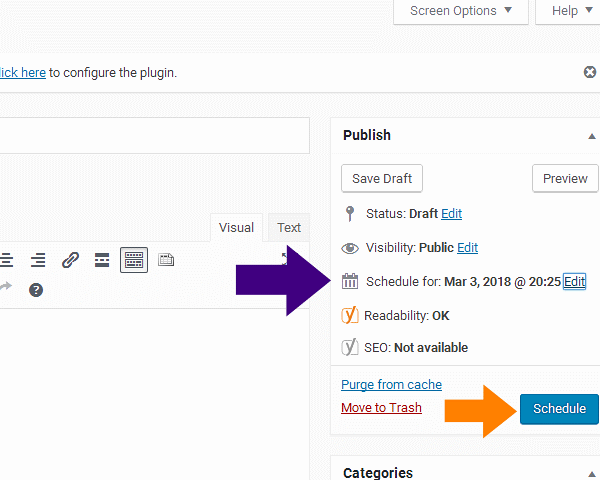
Now Click on the blue ‘Schedule button to lock in the Post for a future date and time.
Visibility Option
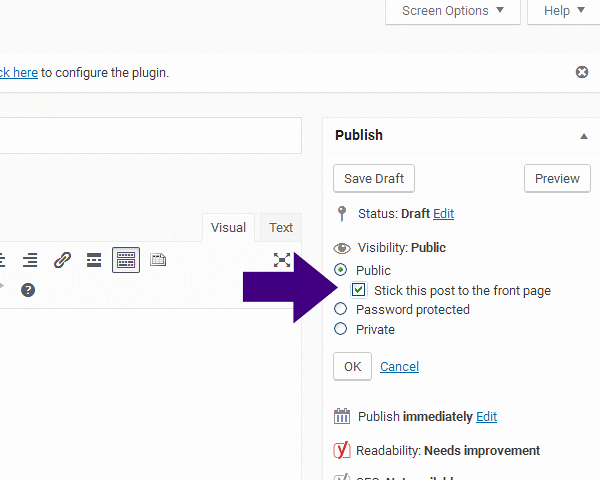
By Default, new Posts display at the top of the page in WordPress. If you want specific Post content to always remain at the page top, reset the Visibility option by Clicking ‘Edit’ in the Publish area.

After you click ‘Edit’ next to Visibility, Click ‘Stick this post to the front page’, under the ‘Public’ option:
This enables the top page position for the Post and will remain there until you disable the option.
Enjoy this sticky Post WordPress plugin !
Return

